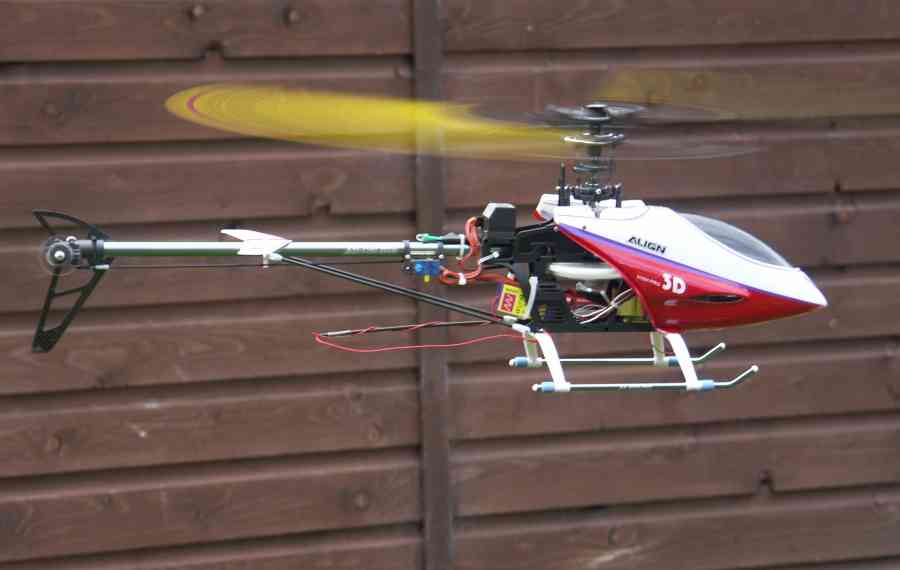
T-Rex 450XL |
Click here for the T-Rex 600 !

The T-Rex, above, was my first full kit build. Up to this point all of my helicopters were bought and flown RTF (ready to fly). The kit came from Midland Helicopters, a long drive for me but I wanted to talk to the staff about this venture into the 'next level' and chat about all the extras you need such as gyros servos etc.
The gyro bought was the CSM 240 micro, 4 Align servos, Align 3S1P 2000mah 18C battery. The only item that was not bought on this visit was the Rx. Trevor recommended the Schultz 8ch digital and he was out of stock but gave me the number of a shop that had them in stock !
On the drive back a small detour soon got me to said shop where I bought the Rx... We were set to build!
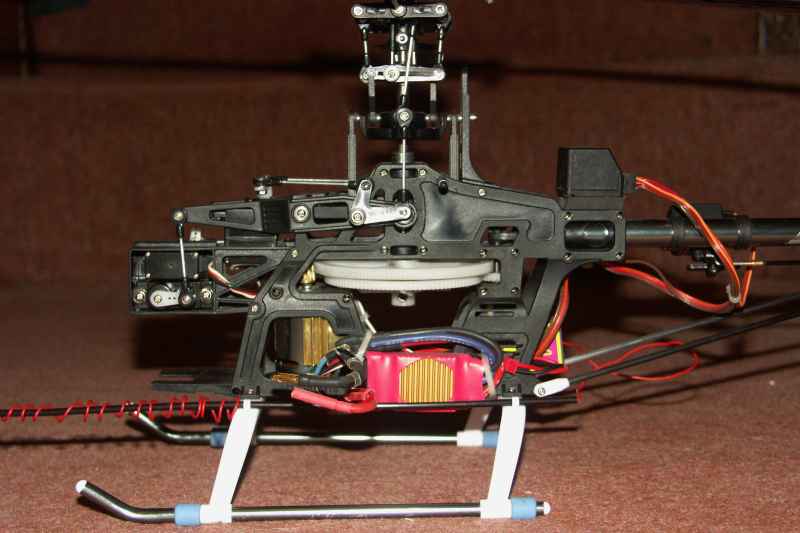
The build went well and you just need to follow the book of words, well more pictures than words. The radio installation was fine, hard to get the Rx well away from the motor and ESC but by using the Schultz Rx with digital processing interference is minimal. ESC fitted so the heatsink faces the side for cooling, heatsink also fitted to motor. You need to solder the 3mm gold connectors onto the motor and ESC and you need a heat gun for the heat shrink sleeving.

As this was my first kit the Futaba Tx needed setting up, again reading the manual and testing without the motor connected is the way.
I did find a Futaba set-up on the web that helped but it still needed some changes. I am please in a way as you will not learn just by coping someone else's work !!
Training gear was made from carbon fiber rod and the orange balls that came on the training gear for the small Twister heli. I left the two rods 1 mtr long, this bird would never tip over !!
Out onto the lawn, powered up and set-up the Align ESC, I found that instruction sheet needed to be read more than once. The 420 Gyro is set from the Tx once it is in setup mode, now this instruction sheet needed reading more than twice but all part of the fun.
The frame has marks to show the pitch of the blades but you do need a pitch gauge to do a good job. Next job is blade balance and tracking, I used a iron bar to hold skids down while tracking. I found this hard to do with the plastic /ABS blades. I soon moved to the wooden blades and these were easy to track. Adjusting the links for this is Ok but the ball ends 'should' only go on one way and I did find half a turn was sometimes needed! Another lesson I found, always use ball joint pliers to remove links BUT remove the sharp edges with a needle file OR you will damage the soft ali link balls !
The next step is to power up and see what happens...... in this case the T-Rex lifted off just fine! I just kept it 18 inches off the grass and was very pleased. The HH gyro needed more setting up, the heli needed trimming as you would expect but I built it and it flew.

Over the next month I bought two more Li-poly batteries, a taco to get the head speed correct (2200rpm down to 2100rpm at full pitch) changed the tail servo to a HDS-877 digital from Ashtec Electronics to stop tail wag and get the best from the gyro.
I think the ground work I did flying and adjusting the small micro helis put me in a good position to build and fly the T-Rex, without that and going it alone without a club would have made a big difference and may well have ended in a project that was never finished or flown!